The Filmpac Ad Challenge
We know you work hard at your craft, and we want to invite you (yes YOU) to show us what you've got in our 10-day Ad Challenge!
Continue Reading

In video editing, if you want to dynamically crop an image or graphic in your edit, masks are the best way to do this.

A mask is a selection that you make within your image, which results in everything outside of that selection becoming no longer visible (or, in inverted mode, everything inside the selection being cut).
In Premiere Pro, masks are easy to make using built-in masking tools, without the need for extra plug-ins.
Premiere Pro Masking can also translate to Adobe Photoshop for image editing.
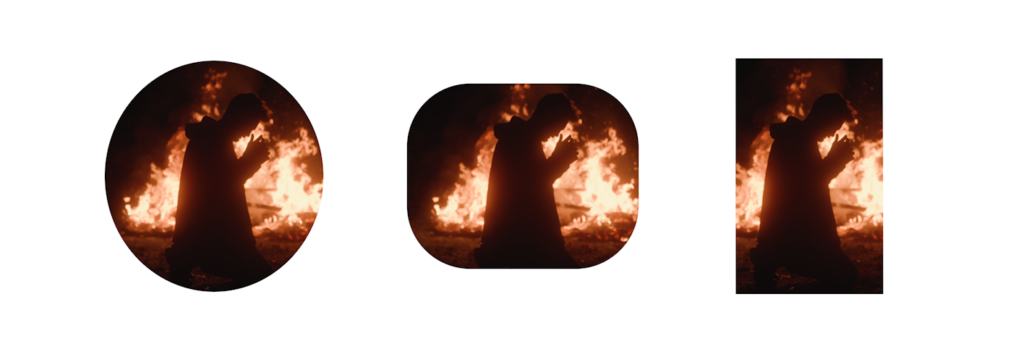
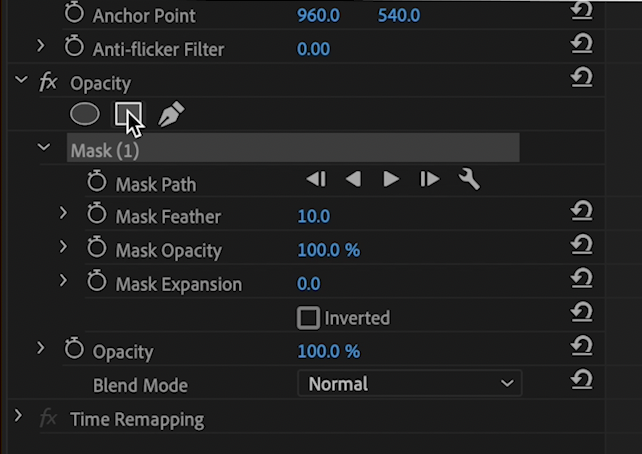
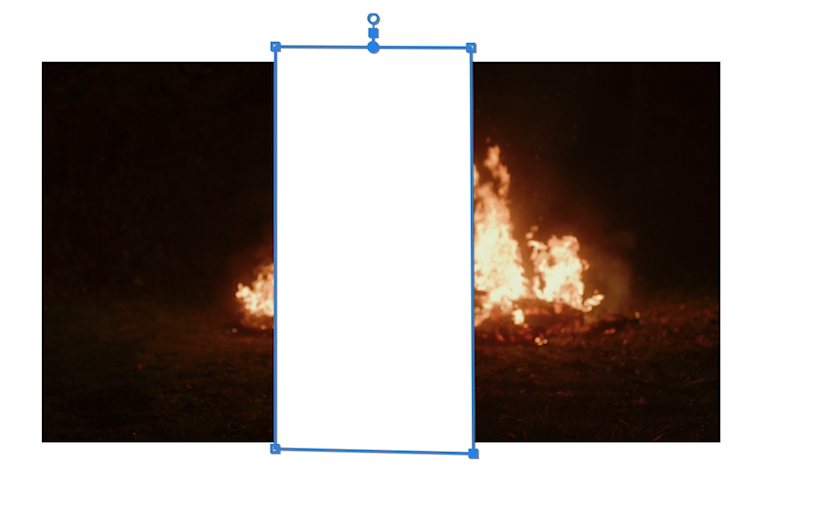
Here’s the easiest way to create masks. Simply click either the rectangle, ellipse, or pen tool in the “mask” section in the “opacity” tab, and a new mask will be created.
You can adjust the mask further by clicking and dragging the anchor point, or even creating additional ones. You can use the draw bezier tool to create curved edges for your mask.
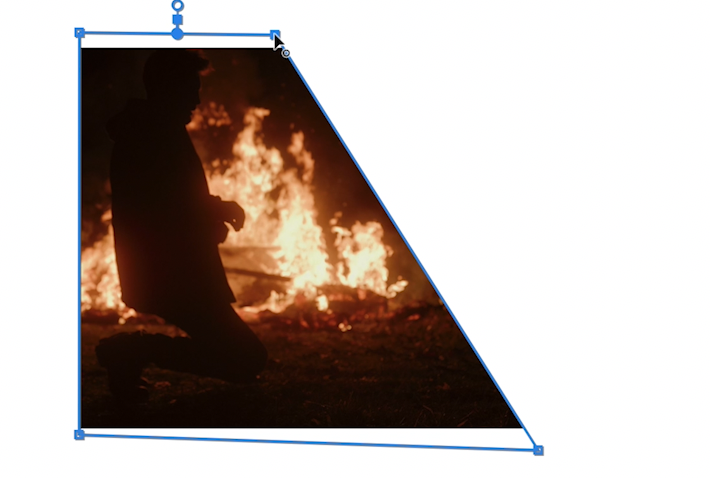
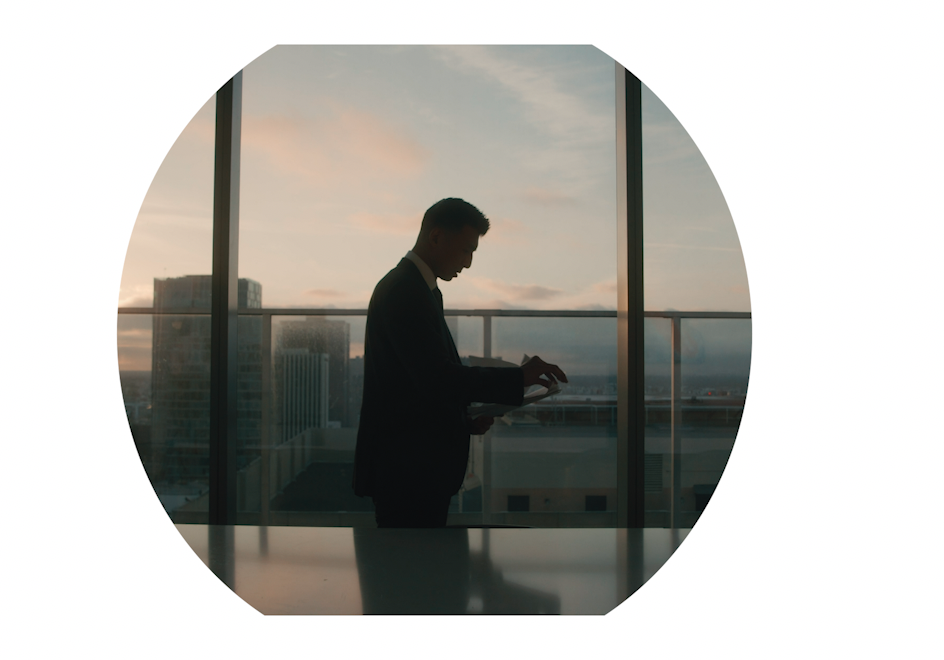
The two pre-made shape tools are a great way to quickly create basic masks, and the draw tool allows for more precise shapes.
In the effects control panel, you can adjust the mask feather, opacity, mask expansion, matte, and even invert or animate the mask path with keyframes.
Masks can also be used on effects (such as Lumetri Color Panel) or adjustment layers during the color correction or color grading process, or to animate transitions. Masks are also used frequently in VFX compositing.


As a video editor, I make frequent use of masks in my edits, and the fact that this can all be done within Adobe Premiere Pro CC is a huge time saver in any filmmaking workflow.
To ensure a mask only affects a specific layer in After Effects, apply the mask directly to that layer. If the mask is on an adjustment layer or a different layer, it will affect all layers beneath it. Remember to lock the layer if you don’t want to accidentally apply changes to it.
Yes, you can copy a mask from one clip to another in Premiere Pro. Simply right-click on the mask in the Effect Controls panel and select ‘Copy’. Then, select the target clip, right-click, and choose ‘Paste’. This is useful for applying the same mask shape to different clips.
Absolutely. Masks in Premiere Pro can be used in conjunction with the Lumetri Color Panel to apply color grading to specific areas of your footage. This technique is particularly useful for correcting exposure or color in selected parts of the image.
To animate a mask in After Effects, first create your mask. Then, open the mask properties, and click the stopwatch next to ‘Mask Path’ to set keyframes. Move the playhead to a new position and adjust the mask to create the animation.
Yes, you can use masks to create split-screen effects in Premiere Pro. By applying masks to different clips and positioning them accordingly, you can have multiple video clips appear on screen simultaneously in a clean, organized manner.
In After Effects, refine the edge of a rotoscoping mask by using the ‘Refine Edge’ tool. This tool is especially useful for dealing with complex edges like hair or fuzzy outlines. It helps to create a more accurate and smooth edge for the mask.
Mask tracking in Premiere Pro works best with simple shapes. For complex shapes, especially those that change form as they move, manual keyframe adjustments might be necessary for precise tracking.
In the Effect Controls panel, select your mask and check or uncheck the ‘Inverted’ checkbox. This will switch between making the inside of the mask visible and the outside visible.
Use the free draw bezier or pen tool to create curved edges. Click to create points and drag to adjust the curvature between these points for a smooth, curved edge.
To animate a mask path, use keyframes. In the Effect Controls panel, position the playhead where you want the animation to start, enable keyframe recording for the Mask Path, then move the playhead and adjust the mask shape as needed.
Masks in Premiere Pro can be used to apply color correction to specific areas. For example, you can use a mask on an adjustment layer with the Lumetri Color effect to selectively change color properties like exposure, saturation, or tint.
For VFX compositing in After Effects, use masks for tasks like removing unwanted objects, combining different video elements, or creating special effects. Precision and smooth mask edges are key for seamless compositing.
Masks created in Premiere Pro can be similar to those in Photoshop in terms of basic concepts like feathering, opacity, and shape. However, the actual tools and interface are different, and Photoshop offers more advanced options for still images.
The mask wrench icon in Premiere Pro opens additional mask settings. Here, you can refine the mask properties, such as feather, opacity, and expansion for more precise control.
Use the pen tool in the ‘Opacity’ tab to draw free-form shapes. Click to create straight lines or click and drag to create curves. This is ideal for masking irregular objects.
Mask expansion in Premiere Pro allows you to increase or decrease the size of your mask. It’s useful for fine-tuning the mask’s fit around your subject.
To create straight lines with the pen tool, simply click to create points without dragging. This will create straight line segments between the points.
Kevin Graham is the Creative Director at Filmpac.
We know you work hard at your craft, and we want to invite you (yes YOU) to show us what you've got in our 10-day Ad Challenge!
Continue Reading
When it comes to professional video editing in the 2020s, two powerful software options stand out: Adobe Premiere Pro vs. DaVinci Resolve.
Continue Reading
As content creators, the computers we use to edit our videos are just as important as the cameras we use to film. Here are our favorites.
Continue Reading
By far, the two most common frame rates in modern American video editing and production are 24fps and 29.97fps. Here's the difference.
Continue Reading

One of the most difficult parts of being a professional filmmaker is effectively managing and budgeting your time.
Continue Reading
Want to make money selling footage through a major stock footage platform like Filmpac? This page will walk you through the processs.
Continue Reading
Virtual reality could be the biggest shift in the way we consume our content since the proliferation of the smartphone.
Continue Reading